Snacks for the Road: Fueling Your Camping Adventure

               Hitting the road for a camping trip is an adventure in itself, but long hours in the car can lead to hunger and unhealthy fast-food temptations. The right road trip snacks can keep your energy levels up while making the journey just as enjoyable as the destination. Whether you’re heading to the mountains, the beach, or a secluded forest hideaway, packing nutritious, homemade, and mess-free snacks is key to a smooth ride. In this guide, we’ll cover the best road trip snack ideas to keep everyone satisfied on the way to your next outdoor escape.

Healthy and Protein-Packed Options
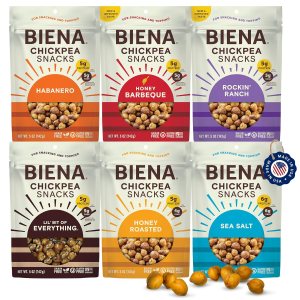
               For sustained energy during long drives, protein-rich snacks are essential. Options like trail mix with nuts and dried fruit, homemade protein bars, or jerky (beef, turkey, or plant-based alternatives) provide a tasty and satisfying way to stay full. For something fresh, cheese sticks and hard-boiled eggs are excellent choices that are easy to pack in a cooler. Avoid overly sugary snacks that cause energy crashes—opt for nut-based granola or roasted chickpeas instead.  We usually make our own trail mix, but that leads to portion control problems, so I suggest buying some prepackaged trail mix instead that allows for easy serving while on the road.


Easy-to-Eat Fruits and Veggies
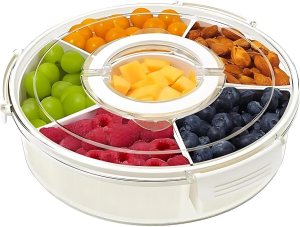
               Staying hydrated and refreshed is just as important as staying full. Grapes, apple slices, baby carrots, and celery sticks are perfect grab-and-go options that won’t make a mess in the car. Pre-cutting and storing them in reusable snack containers makes it easy to access them when hunger strikes. Pair these with hummus cups or peanut butter packs for added flavor and nutrition.


Crunchy and Satisfying Munchies
                Every road trip needs some crunchy, salty snacks to keep things interesting. Instead of greasy potato chips, opt for pita chips, rice cakes, or popcorn. For a DIY twist, make seasoned roasted almonds or spiced chickpeas before hitting the road. If you’re craving something cheesy, homemade cheese crisps are a low-carb alternative to traditional cheese crackers.


DIY Sweet Treats Without the Sugar Crash
                While it’s tempting to load up on candy, refined sugar can lead to sluggishness and mood swings. Instead, prepare homemade energy bites with oats, honey, peanut butter, and dark chocolate. Dried fruit like mango slices, banana chips, or dates also offers natural sweetness without artificial additives. If you want a road trip dessert, Greek yogurt-covered raisins or dark chocolate-covered almonds provide a healthier indulgence.

Final Tips for Road Trip Snack Success
                To make snacking on the road stress-free, pack everything in easy-to-reach, portion-controlled containers. Use insulated bags or coolers to keep perishable items fresh, and always have napkins and wipes handy for quick cleanups. Staying hydrated is just as important as eating well, so bring plenty of refillable water bottles to keep everyone energized. With the right road trip snacks, you’ll arrive at your campsite ready to set up, explore, and start cooking under the stars.
                                                   

Chicken Fried Rice

Jump to IngredientsJump to RecipeCookware Used

A Classic Dish That Never Goes Out of Style

The Quick Fix for Cravings and Leftovers

Chicken Fried Rice is the ultimate comfort food that also happens to be a weeknight lifesaver. It’s fast, flavorful, and endlessly customizable. The last time I made this dish was on a busy Tuesday evening when the fridge was looking sparse, and let me tell you—it turned into a feast in under 30 minutes. The best part? Everyone loves it, from kids to adults, and it’s a great way to use up leftover chicken or veggies. Plus, there’s something about the smoky aroma of stir-fried rice that just makes the kitchen feel cozy.

Nutritionally, Chicken Fried Rice offers a well-rounded meal. The chicken gives you a healthy dose of lean protein, the vegetables provide essential vitamins and minerals, and the rice delivers carbohydrates to keep you energized. Opt for brown rice if you’re looking to up the fiber content. It’s proof that a quick, delicious meal can also be nutritious.


Choosing the Right Cookware

The best Chicken Friend Rice requires a little bit of extra thought in that the rice should be cooked the day before. If you own a rice cooker, break it out and get to work! We rely on our Instant Pot for the rice cooking since we have limited space when traveling. The Instant Pot allows us to cook almost anything and has been a huge time saver in most situations, plus it fits snugly in our RV!


Ingredients That Make It All Come Together

  • <2 cups cooked rice (day-old rice works best)
  • 1 1/2 cups cooked chicken, diced or shredded
  • 2 tablespoons vegetable oil
  • 3 garlic cloves, minced
  • 1 medium onion, finely chopped
  • 1 cup frozen peas and carrots
  • 3 green onions, sliced
  • 2 eggs, lightly beaten
  • 3 tablespoons soy sauce (low-sodium preferred)
  • 1 teaspoon sesame oil
  • Salt and pepper to taste
  • Optional garnish: sesame seeds and extra green onions

How to Make Chicken Fried Rice Like a Pro

  1. Heat Things Up
    Heat 1 tablespoon of vegetable oil in a large wok or non-stick skillet over medium-high heat. Add the garlic and chopped onion, cooking until fragrant and slightly softened, about 2-3 minutes.
  2. Cook the Veggies
    Stir in the frozen peas and carrots, cooking for another 3-4 minutes until heated through. Push everything to one side of the pan.
  3. Scramble the Eggs
    Add the remaining oil to the empty side of the pan, then pour in the beaten eggs. Scramble them until just set, then mix them with the veggies.
  4. Add the Chicken and Rice
    Toss in the cooked chicken and day-old rice, breaking up any clumps. Stir everything together, letting the rice get slightly crispy for that classic fried rice texture.
  5. Season to Perfection
    Drizzle the soy sauce and sesame oil over the rice mixture, stirring to combine. Season with salt and pepper to taste. Cook for another 2-3 minutes until everything is well-coated and heated through.
  6. Garnish and Serve
    Sprinkle with sliced green onions and sesame seeds, if desired. Serve hot and enjoy your homemade takeout masterpiece.

Why This Recipe Will Become Your Go-To

Chicken Fried Rice is the perfect blend of convenience and flavor. It’s quick to whip up, uses simple ingredients, and is guaranteed to please everyone at the table. I hope this recipe becomes your go-to for busy nights or whenever you’re craving something comforting and satisfying. Let me know how it turns out and what extras you added to make it your own—the possibilities are endless!

Cookware Used

HexClad Hybrid Nonstick 10 Inch Wok

Instant Pot Duo Plus

Disclaimer: As an Amazon affiliate, I may earn commission on any links on this page

The Best Chicken Caesar Salad

Jump to IngredientsJump to RecipeCookware Used

A Classic Dish That Never Goes Out of Style

Chicken Caesar Salad is the little black dress of salads—it’s timeless, versatile, and always hits the mark. Whether you’re enjoying a light lunch, a side dish, or even a main course, this salad does it all. The last time I made it, we had a family picnic in the backyard, and this dish was the MVP. Everyone loved the balance of crisp romaine, savory grilled chicken, crunchy croutons, and that creamy Caesar dressing. It’s simple, satisfying, and somehow manages to feel both fancy and casual at the same time.

But let’s not forget the health benefits! This salad is packed with protein from the chicken, fiber from the romaine lettuce, and healthy fats from the Parmesan and dressing (especially if you go for a homemade version). It’s proof that delicious food can also be good for you.


Choosing the Right Cookware

Anytime I get an excuse to fire up the grill, I take it! Whether you use a charcoal or pellet grill, or even a gas grill, it just tastes so much better than cooking on a stove top for me. We like to use the Big Green Egg for all of our grilling, and anytime we use the Egg we always cook on a Cast Iron Grill Grate to ensure a nice sear, and a Heat Deflector to avoid any unwanted scorching or burning from stray flames.


Ingredients That Make It Legendary

  • 2 boneless, skinless chicken breasts
  • 1 tablespoon olive oil
  • 1 teaspoon garlic powder
  • 1/2 teaspoon salt
  • 1/4 teaspoon black pepper
  • 1 large head of romaine lettuce, chopped
  • 1/2 cup grated Parmesan cheese
  • 1 cup croutons
  • 1/2 cup Caesar dressing (store-bought or homemade)
  • Lemon wedges, for garnish

How to Assemble a Chicken Caesar Salad Worth Swooning Over

  1. Grill the Chicken
    Preheat your grill or grill pan to medium-high heat. Rub the chicken breasts with olive oil, garlic powder, salt, and pepper. Grill for 6-8 minutes per side, or until the internal temperature reaches 165°F. Let the chicken rest for a few minutes before slicing.
  2. Prep the Greens
    Wash and chop the romaine lettuce, then pat it dry with a clean kitchen towel or use a salad spinner. Arrange the lettuce in a large serving bowl or on individual plates.
  3. Add the Good Stuff
    Top the lettuce with sliced grilled chicken, Parmesan cheese, and croutons. For a little extra flair, toast the croutons in a skillet with a drizzle of olive oil and a pinch of garlic powder.
  4. Dress It Up
    Drizzle the Caesar dressing over the salad and toss gently to coat. Alternatively, serve the dressing on the side so everyone can add their preferred amount.
  5. Garnish and Serve
    Squeeze a lemon wedge over the salad for a bright, zesty finish. Serve immediately and watch it disappear.


Why You’ll Love This Recipe

Chicken Caesar Salad is the perfect mix of fresh, savory, and satisfying. It’s easy to make, endlessly adaptable, and a guaranteed crowd-pleaser. Whether you’re whipping it up for a quick weekday meal or impressing guests at a dinner party, this salad always delivers. Let me know how yours turns out, and don’t forget to experiment with homemade dressing for an extra special touch!

Cookware Used

Ourokhome Salad Spinner

Green Egg Heat Deflector

Green Egg Cast Iron Grill Grate

Disclaimer: As an Amazon affiliate, I may earn commission on any links on this page

Beautiful Baked BBQ Chicken Wings

Jump to IngredientsJump to RecipeCookware Used

The MVP of Game Day Snacks

Buffalo Chicken Wings are the ultimate crowd-pleaser. Whether it’s game day, a family gathering, or a casual movie night, these wings never fail to steal the spotlight. The last time I made a batch, they disappeared so fast you’d think I had a team of NFL linebackers in my living room. There’s just something about that perfect blend of crispy skin, tangy Buffalo sauce, and a side of cool ranch or blue cheese dressing that keeps everyone coming back for more. They’re finger-licking good and downright addictive.

Beyond their unbeatable flavor, Buffalo Chicken Wings are surprisingly versatile. Chicken wings are a great source of protein, and baking instead of frying cuts down on extra fat and calories without sacrificing crunch. Plus, the spicy kick from the sauce can even give your metabolism a little boost. So go ahead and enjoy—guilt-free!


Choosing the Right Cookware

The key to baking great wings is air circulation and even heat. We use this Nordic Ware XL Baking Tray to allow the wings even air circulation to help for that crispy skin and even cook. You can line the base of it with aluminum foil for easier cleaning but we just let it drip onto the pan and clean up afterwards. Sometimes that extra juice can be added to the finished wings for some extra flavor!

Ingredients to Wing It Right

  • 2 pounds chicken wings, split into flats and drumettes
  • 1 tablespoon baking powder
  • 1 teaspoon garlic powder
  • 1 teaspoon smoked paprika
  • 1/2 teaspoon salt
  • 1/4 teaspoon black pepper
  • 1/2 cup hot sauce (like Frank’s RedHot)
  • 1/4 cup unsalted butter, melted
  • 1 tablespoon honey
  • Ranch or blue cheese dressing, for dipping
  • Celery and carrot sticks, for serving

How to Make Buffalo Chicken Wings That Fly Off the Plate

  1. Prep the Wings
    Preheat your oven to 425°F. Line a Baking Tray with aluminum foil and place a wire rack on top. Pat the chicken wings dry with paper towels—this step is crucial for getting them crispy. Toss the wings with baking powder, garlic powder, smoked paprika, salt, and pepper until evenly coated.
  2. Bake to Perfection
    Arrange the wings in a single layer on the wire rack. Bake for 40-50 minutes, flipping halfway through, until the wings are golden brown and crispy. Pro tip: For an extra-crispy finish, broil them for the last 2-3 minutes, but keep an eye on them to avoid burning.
  3. Whip Up the Sauce
    In a small saucepan, combine hot sauce (you can’t go wrong with Frank’s RedHot Sauce), melted butter, and honey over low heat. Stir until smooth and heated through. Adjust the spice level by adding more hot sauce or honey to taste.
  4. Sauce ‘Em Up
    Transfer the baked wings to a large bowl and pour the Buffalo sauce over them. Toss until every wing is evenly coated and glistening with spicy goodness.
  5. Serve and Devour
    Arrange the wings on a platter with celery and carrot sticks on the side. Don’t forget the ranch or blue cheese dressing for dipping. Serve immediately and watch them disappear.


Why These Wings Will Be the Real MVP

Buffalo Chicken Wings are the perfect combination of crispy, spicy, and satisfying. They’re easy to make, always a hit, and the ultimate finger food for any occasion. I hope this recipe makes its way into your rotation and becomes as beloved in your home as it is in mine. Let me know how they turn out and what dipping sauce you chose—because let’s be honest, that’s just as important!

Cookware Used

Nordic Ware XL Oven Baking Tray

Umite Chef Mixing Bowls with Airtight Lids Set

Disclaimer: As an Amazon affiliate, I may earn commission on any links on this page

Green Egg BBQ Chicken

Jump to IngredientsJump to RecipeCookware Used

Why BBQ Grilled Chicken is the King of Cookouts

BBQ Grilled Chicken is the undisputed champ of summer cookouts, family gatherings, and casual dinners. There’s just something magical about the smoky aroma, charred grill marks, and finger-licking sauce that makes everyone gravitate toward the grill. The last time I made this dish was during a weekend barbecue, and let me tell you, it was the first thing to disappear from the table. Even the pickiest eater in the group grabbed seconds (and maybe thirds). Whether you pair it with coleslaw, potato salad, or a pile of buttery corn on the cob, this dish has a way of stealing the show every single time.

From a nutritional perspective, BBQ Grilled Chicken offers a solid balance. Chicken thighs or breasts are excellent sources of protein, while a homemade BBQ sauce can keep things healthier by cutting down on added sugars and preservatives. Plus, grilling instead of frying reduces unnecessary fats, making this dish a slightly guilt-free indulgence.


Choosing the Right Cookware

With any grill recipe, every home chef is going to have their own (usually strong) opinion. We use a Green Egg, but if you know what you are doing you can make delicious food on any grill. When using our Green Egg we use a Heat Deflector which helps to avoid unwanted charring and allows for a true even cook through the entire chicken. We also use an easy to clean Cast Iron Grate to ensure a proper sear.


The Secret to Perfect BBQ Grilled Chicken: Ingredients

  • 4 boneless, skinless chicken breasts or thighs
  • 1 cup BBQ sauce (store-bought or homemade)
  • 2 tablespoons olive oil
  • 1 teaspoon garlic powder
  • 1 teaspoon smoked paprika
  • 1 teaspoon salt
  • 1/2 teaspoon black pepper
  • Fresh parsley for garnish

How to Make BBQ Grilled Chicken That Will Wow Everyone

  1. Marinate for Maximum Flavor
    In a small bowl, mix olive oil, garlic powder, smoked paprika, salt, and black pepper. Rub this mixture all over the chicken and let it marinate for at least 30 minutes, or up to 8 hours for deeper flavor.
  2. Preheat the Grill
    Heat your grill to medium-high heat (about 400°F). If you’re using a charcoal grill, make sure the coals are evenly distributed for consistent heat. A cast-iron grill pan works beautifully if you’re cooking indoors. Make sure you use something like a Heat Shield to protect the chicken from any unwanted scorching or burning.
  3. Grill the Chicken
    Place the chicken on the grill (We use a Cast Iron Grill Grate for the perfect cook) and cook for 5-7 minutes per side, depending on the thickness. Use a meat thermometer to ensure the internal temperature reaches 165°F for safe consumption.
  4. Sauce It Up
    During the last 2-3 minutes of grilling, brush the chicken generously with BBQ sauce on both sides. Of course you should use whatever your preference is but our favorite is Stubbs BBQ Sauce, and more recently the Honey Jalapeno is all we buy! Let it caramelize slightly for that irresistible sticky, smoky finish. Avoid adding the sauce too early, as it can burn.
  5. Serve and Savor
    Remove the chicken from the grill and let it rest for a few minutes. Garnish with freshly chopped parsley and serve hot alongside your favorite sides.

Why This Recipe is a Must-Try

BBQ Grilled Chicken is the ultimate blend of flavor and simplicity. It’s easy to make, endlessly versatile, and guaranteed to be a crowd-pleaser. Whether it’s a sunny summer day or a casual dinner night, this dish is always a winner. I hope it becomes a staple at your table, just like it has at mine. Let me know how it turns out and what sides you paired it with—bonus points if you’ve got leftovers (though I doubt you will)!

Green Egg Heat Deflector

Green Egg Cast Iron Grill Grate

Disclaimer: As an Amazon affiliate, I may earn commission on any links on this page

Chicken Tikka Marsala With a Flavor Explosion

Jump to IngredientsJump to RecipeCookware Used

The Dish That Turns Dinner Into a Feast

Chicken Tikka Masala is more than a meal; it’s a celebration on a plate. My family can’t get enough of its creamy, spiced tomato sauce and tender pieces of marinated chicken. The last time I made this dish was for a small gathering, and it’s safe to say it was the star of the evening. Plates were wiped clean with naan, and everyone asked for the recipe. It’s the kind of dish that makes you feel like you’re dining in an authentic Indian restaurant without leaving your kitchen.

Nutritionally, Chicken Tikka Masala strikes a great balance. The chicken is a fantastic source of lean protein, while the tomato-based sauce provides a dose of antioxidants like lycopene. Spices like turmeric and cumin not only add incredible flavor but also bring anti-inflammatory and digestive benefits. Pair it with basmati rice or naan bread, and you’ve got a satisfying, well-rounded meal.


Choosing the Right Cookware

For pasta, I always use my Caraway Nonstick Ceramic Sauté Pan with Lid. The quality is just fantastic, and using a non-stick, high quality pot is how I was taught to make the best food I can. I’m definitely not a perfect chef but it’s hard to mess up a recipe when you have such great quality cookware.


Ingredients You’ll Need

  • 1 pound boneless, skinless chicken thighs, cut into bite-sized pieces
  • 1 cup plain yogurt
  • 1 tablespoon lemon juice
  • 2 teaspoons ground cumin
  • 1 teaspoon ground coriander
  • 1 teaspoon turmeric
  • 1 teaspoon paprika
  • 1/2 teaspoon cayenne pepper (optional for heat)
  • Salt and pepper to taste
  • 2 tablespoons vegetable oil
  • 1 large onion, finely chopped
  • 3 garlic cloves, minced
  • 1 tablespoon fresh ginger, grated
  • 1 can (14 ounces) crushed tomatoes
  • 1 cup heavy cream or coconut milk
  • 1 teaspoon garam masala
  • 1/2 teaspoon ground cardamom (optional)
  • Fresh cilantro, chopped, for garnish
  • Basmati rice or naan for serving

How to Master Chicken Tikka Masala

  1. Marinate Like a Pro
    In a large bowl, combine yogurt, lemon juice, cumin, coriander, turmeric, paprika, cayenne (if using), salt, and pepper. Add the chicken pieces and mix well to coat. Cover and refrigerate for at least 1 hour, preferably overnight, to let the flavors soak in.
  2. Sear the Chicken
    Heat 1 tablespoon of vegetable oil in a heavy-bottomed skillet or grill pan over medium-high heat. Cook the marinated chicken pieces for 4-5 minutes on each side until lightly charred and cooked through. Set aside.
  3. Build the Sauce
    In the same skillet, heat the remaining oil. Add the onion and sauté until golden, about 5 minutes. Stir in garlic and ginger, cooking for another minute. Add crushed tomatoes and simmer for 10 minutes, letting the flavors meld together.
  4. Bring It All Together
    Stir in the cream or coconut milk, garam masala, and cardamom (if using). Return the chicken to the skillet, and let everything simmer for 15 minutes until the sauce thickens and the chicken is tender.
  5. Garnish and Serve
    Sprinkle freshly chopped cilantro over the top and serve hot with basmati rice or naan bread. Don’t forget to set out extra naan for scooping up every drop of that luscious sauce.

Why You Need This Recipe in Your Life

Chicken Tikka Masala is the ultimate comfort food with a twist. Its rich, aromatic flavors make it perfect for special occasions or any night you want to elevate dinner. I hope this recipe brings warmth and joy to your table. Let me know how it turns out and what you paired it with—because there’s no wrong way to enjoy this dish!

Caraway Nonstick Ceramic Sauté Pan with Lid

Umite Chef Mixing Bowls with Airtight Lids Set

Disclaimer: As an Amazon affiliate, I may earn commission on any links on this page

Chicken Stir-Fry Recipe With Crispy and Crunchy Stir-Fry Veggies

Jump to IngredientsJump to RecipeCookware Used

A One-Pan Wonder That Never Disappoints

Chicken Stir-Fry is the weeknight dinner hero you didn’t know you needed. It’s fast, healthy, and packed with vibrant colors and bold flavors. The last time I made this dish, my family practically licked their plates clean. It’s the kind of meal that makes you feel like you’re running your own five-star Chinese restaurant—except you don’t have to worry about the Yelp reviews. Plus, everything comes together in one pan, which means fewer dishes (cue applause from whoever’s on cleanup duty).

On the health front, Chicken Stir-Fry is a real winner. Loaded with lean chicken breast for protein, a rainbow of veggies for fiber and vitamins, and a flavorful yet light sauce, it’s as nourishing as it is delicious. Bell peppers bring a boost of vitamin C, broccoli adds antioxidants, and even the soy sauce contributes a dose of umami magic. Whether you’re feeding a hungry family or meal prepping for the week, this dish ticks all the boxes.


Choosing the Right Cookware

For pasta, I always use my Caraway Nonstick Ceramic Sauté Pan with Lid. The quality is just fantastic, and using a non-stick, high quality pot is how I was taught to make the best food I can. I’m definitely not a perfect chef but it’s hard to mess up a recipe when you have such great quality cookware.


The Cast of Ingredients

  • 2 tablespoons vegetable oil
  • 1 pound chicken breast, thinly sliced
  • 2 cups broccoli florets
  • 1 red bell pepper, thinly sliced
  • 1 yellow bell pepper, thinly sliced
  • 1 medium carrot, julienned
  • 3 garlic cloves, minced
  • 1 tablespoon fresh ginger, grated
  • 1/4 cup soy sauce
  • 2 tablespoons hoisin sauce
  • 1 tablespoon honey
  • 1 tablespoon cornstarch mixed with 2 tablespoons water
  • Cooked jasmine rice or noodles for serving
  • Sesame seeds and sliced green onions for garnish

How to Make Chicken Stir-Fry Without Losing Your Cool

  1. Get Prepped Like a Pro
    Have all your ingredients ready to go before you start cooking. Stir-fry moves fast, so chop your veggies, slice your chicken, and mix your sauce ingredients in advance.
  2. Sear the Chicken
    Heat 1 tablespoon of vegetable oil in a large wok or a non-stick skillet over medium-high heat. Add the chicken slices and cook for 4-5 minutes until golden and cooked through. Remove and set aside.
  3. Veggie Time
    Add the remaining oil to the pan, then toss in the broccoli, bell peppers, and carrots. Stir-fry for about 5 minutes, or until the veggies are tender-crisp. Add the garlic and ginger during the last minute to release their aroma.
  4. Bring It All Together
    Return the chicken to the pan and pour in the sauce (soy sauce, hoisin sauce, honey, and cornstarch slurry). Stir everything together until the sauce thickens and coats the chicken and veggies beautifully.
  5. Serve Like a Boss
    Spoon the Chicken Stir-Fry over cooked jasmine rice or noodles. Garnish with sesame seeds and sliced green onions for that extra flair. Serve immediately and watch everyone dig in.

Why This Recipe Deserves a Spot in Your Rotation

Chicken Stir-Fry is the ultimate multitasker. It’s quick, healthy, and endlessly customizable—swap out the veggies for whatever you have on hand or adjust the sauce to your liking. I hope this dish brings as much joy to your table as it does to mine. Let me know how it turns out and if your family asks for seconds (spoiler: they will)!

Caraway Nonstick Ceramic Sauté Pan with Lid

Disclaimer: As an Amazon affiliate, I may earn commission on any links on this page

The Perfect Chicken Parmesan Recipe

Jump to IngredientsJump to RecipeCookware Used

Chicken Parmesan—or Chicken Parm, as it’s lovingly called in my house—is like the A-list celebrity of chicken recipes. It’s comforting, crispy, cheesy, and downright irresistible. Last week, I whipped up a batch for a family game night, and let me tell you, it stole the show. Uno cards were abandoned, Monopoly pieces were forgotten, and all eyes were on the golden, bubbling perfection coming out of the oven. There’s just something magical about the combination of crispy chicken, rich marinara sauce, and gooey melted cheese. It’s a dish that makes you feel like you’re dining in a fancy Italian restaurant—minus the hefty bill.

Now, let’s talk health perks, because Chicken Parmesan has them! Sure, it’s indulgent, but the chicken is a lean source of protein that keeps you feeling satisfied. The marinara sauce provides a healthy dose of lycopene, a powerful antioxidant found in tomatoes. Even the cheese contributes calcium to support strong bones. Who knew comfort food could have a nutritious side hustle?


Choosing the Right Cookware

For pasta, I always use my Caraway Nonstick Ceramic Sauté Pan with Lid. The quality is just fantastic, and using a non-stick, high quality pot is how I was taught to make the best food I can. I’m definitely not a perfect chef but it’s hard to mess up a recipe when you have such great quality cookware.


What You’ll Need to Make Magic Happen

  • 2 large chicken breasts, halved horizontally to make 4 thin fillets
  • 1 cup all-purpose flour
  • 2 large eggs, beaten
  • 1 cup breadcrumbs
  • 1/2 cup grated Parmesan cheese
  • 1 teaspoon dried oregano
  • 1 teaspoon garlic powder
  • 1/2 teaspoon salt
  • 1/4 teaspoon black pepper
  • 1/2 cup vegetable oil for frying
  • 2 cups marinara sauce
  • 1 1/2 cups shredded mozzarella cheese
  • Fresh basil leaves for garnish


How to Turn Your Kitchen Into an Italian Bistro

  1. Prep Like a Pro
    Set up your breading station with three shallow dishes: one with flour, one with beaten eggs, and one with breadcrumbs mixed with Parmesan, oregano, garlic powder, salt, and pepper. Coat each chicken fillet in flour, dip it in the eggs, and press it into the breadcrumb mixture until fully coated.
  2. Crispy Chicken Dreams
    Heat the vegetable oil in a large skillet (a heavy-duty cast-iron skillet works wonders here) over medium heat. Fry the breaded chicken fillets for 3-4 minutes per side until golden brown and crispy. Transfer them to a plate lined with paper towels to drain excess oil.
  3. Layer the Love
    Preheat your oven to 375°F. Spread a thin layer of marinara sauce on the bottom of a baking dish. Place the chicken fillets on top, then spoon more marinara sauce over each piece. Sprinkle generously with mozzarella cheese.
  4. Bake Until Bubbly
    Pop the dish into the oven and bake for 20 minutes, or until the cheese is melted and bubbly, and the chicken is cooked through. Pro tip: Broil for the last 2 minutes for that irresistible golden cheese topping.
  5. Finish Like a Boss
    Garnish with fresh basil leaves and serve immediately. Pair it with spaghetti, garlic bread, or a crisp green salad for a complete Italian feast.

Let’s Wrap This Up

Chicken Parmesan is the kind of meal that’s impossible not to love. It’s indulgent yet simple, fancy yet approachable, and always a hit. I hope this recipe becomes a regular at your table and brings as much joy to your home as it does to mine. Let me know how it turns out and if your family fights over the last piece—because mine always does!

Caraway Nonstick Ceramic Sauté Pan with Lid

Disclaimer: As an Amazon affiliate, I may earn commission on any links on this page

An Amazing Chicken Alfredo Dish for an Easy Weeknight Dinner

Jump to IngredientsJump to RecipeCookware Used

Chicken Alfredo Pasta is a household favorite because it’s creamy, flavorful, and so easy to make. It’s the kind of meal that everyone—from picky eaters to gourmet lovers—enjoys. The rich, cheesy sauce pairs beautifully with tender chicken and perfectly cooked pasta. Plus, it’s ready in under 30 minutes, making it perfect for busy weeknights. Did I mention the health benefits? Lean chicken provides protein, while the pasta delivers energy-boosting carbohydrates. It’s comfort food at its best!


Choosing the Right Cookware

For pasta, I always use my Caraway Nonstick Ceramic Dutch Oven Pot. The quality is just fantastic, and using a non-stick, high quality pot is how I was taught to make the best food I can. I’m definitely not a perfect chef but it’s hard to mess up a recipe when you have such great quality cookware.


Ingredients

Here’s what you’ll need for the Chicken Alfredo Recipe:

  • 2 tablespoons olive oil
  • 2 chicken breasts, sliced into strips
  • 12 ounces fettuccine pasta
  • 2 tablespoons unsalted butter
  • 3 garlic cloves, minced
  • 1 1/2 cups heavy cream
  • 1 cup freshly grated Parmesan cheese
  • Salt and pepper to tasteFresh
  • parsley, chopped, for garnish

Step-by-Step Instructions

  1. Cook the pasta
    Bring a large pot of salted water to a boil. Add the fettuccine and cook until al dente, following the package instructions. Drain and set aside.
  2. Cook the chicken
    Heat olive oil in a large skillet over medium heat. Season the chicken strips with salt and pepper, then sauté until golden brown and fully cooked, about 5-7 minutes. Remove and set aside.
  3. Make the sauce
    In the same skillet, melt the butter over medium heat. Add minced garlic and sauté until fragrant, about 1 minute. Pour in the heavy cream and bring to a simmer. Stir in the Parmesan cheese and cook until the sauce thickens slightly, about 3-4 minutes.
  4. Combine everything
    Add the cooked pasta and chicken back into the skillet, tossing to coat everything evenly in the sauce. Adjust seasoning with more salt and pepper if needed.
  5. Garnish and serve
    Transfer to plates or a serving dish, then garnish with freshly chopped parsley. Serve immediately and enjoy the creamy goodness.

A Final Note

I hope this Chicken Alfredo Pasta becomes a staple in your kitchen as it has in ours. It’s quick, satisfying, and feels like a restaurant-quality dish made right at home. Let me know if your family loves it as much as mine does!

Cookware Used

Caraway Nonstick Ceramic Dutch Oven Pot

Disclaimer: As an Amazon affiliate, I may earn commission on any links on this page

The Best Butter Chicken Recipe: A Simple Weeknight Dish

Jump to IngredientsJump to RecipeCookware Used

Butter Chicken is a dish that brings the whole family together—literally. The moment its tantalizing aroma fills the house, everyone migrates to the kitchen, eager for a taste. The last time I made this creamy, spiced dish was for a family movie night. We paired it with warm naan and fluffy basmati rice, and let’s just say, the movie took a backseat to the food. It’s a dish that’s both comforting and adventurous, offering a perfect introduction to Indian cuisine for those who may not be familiar. The mild heat balanced with the rich tomato-cream sauce makes it a universal favorite.

From a nutritional standpoint, Butter Chicken has plenty to offer. The chicken itself is a great source of lean protein, while the tomato base is rich in antioxidants like lycopene, known for promoting heart health. The spices—such as turmeric, cumin, and ginger—not only add incredible flavor but also boast anti-inflammatory properties. Even the butter and cream, in moderation, provide a satisfying richness that keeps you full and content.


Choosing the Right Cookware

For chili, I always reach for my 6-quart cast iron Dutch oven. Why? Because chili is all about layering flavors, and the heavy-duty cast iron holds heat evenly, allowing everything to simmer beautifully without burning. Plus, the wide base ensures plenty of space to brown the beef and sauté the veggies—essential for flavor development. If you don’t have a Dutch oven, a large heavy-bottomed pot with a lid works well too. Just make sure it’s sturdy enough for a long, cozy simmer.


Ingredients

Here’s what you’ll need for the Butter Chicken Recipe:

  • 1 1/2 pounds boneless, skinless chicken thighs, cut into bite-sized pieces
  • 1 cup plain yogurt
  • 2 tablespoons lemon juice
  • 1 tablespoon ground cumin
  • 1 teaspoon ground turmeric
  • 1 teaspoon garam masala
  • 1 teaspoon chili powder
  • 3 tablespoons unsalted butter
  • 1 large onion, finely chopped
  • 3 garlic cloves, minced
  • 1 tablespoon fresh ginger, grated
  • 1 can (14 ounces) crushed tomatoes
  • 1 cup heavy cream
  • 2 teaspoons ground coriander
  • 1 teaspoon paprika
  • Salt and pepper to taste
  • Fresh cilantro, chopped, for garnish

Step-by-Step Instructions

  1. Marinate the chicken
    In a large bowl, combine yogurt, lemon juice, cumin, turmeric, garam masala, chili powder, and a pinch of salt. Add the chicken pieces and mix well to coat. Cover and refrigerate for at least 1 hour, or overnight for deeper flavor.
  2. Cook the chicken
    Heat 1 tablespoon of butter in a large, heavy-bottomed skillet or Dutch oven over medium heat. Sear the chicken pieces until golden on the outside but not fully cooked through, about 4-5 minutes per side. Remove and set aside.
  3. Prepare the Butter Chicken Sauce
    In the same skillet, melt the remaining butter and add the chopped onion. Sauté until translucent, about 5 minutes. Stir in garlic and ginger, cooking for another 1-2 minutes until fragrant. Add crushed tomatoes, coriander, paprika, and a pinch of salt. Simmer for 10 minutes, stirring occasionally.
  4. Finish the dish
    Stir in the heavy cream and return the chicken to the skillet. Simmer gently for 15-20 minutes, or until the chicken is fully cooked and tender. Adjust seasoning with salt and pepper to taste.
  5. Garnish and serve
    Sprinkle fresh cilantro over the Butter Chicken and serve hot with basmati rice or naan bread for a complete meal.

A Final Note

Butter Chicken is more than just a meal; it’s an experience. Its rich, creamy texture and perfectly balanced spices make it a hit at any table. I hope this recipe finds a special place in your kitchen, just like it has in mine. Let me know how you enjoyed it and what you paired it with for the perfect Indian feast!

Cookware Used

Mueller 6 Qt Enameled Cast Iron Dutch Oven

Disclaimer: As an Amazon affiliate, I may earn commission on any links on this page